Scanner Appliance
This appliance can be deployed locally and used for scanning git repositories. Multiple appliances can be deployed simultaneously.
When to use a Scanner Appliance?
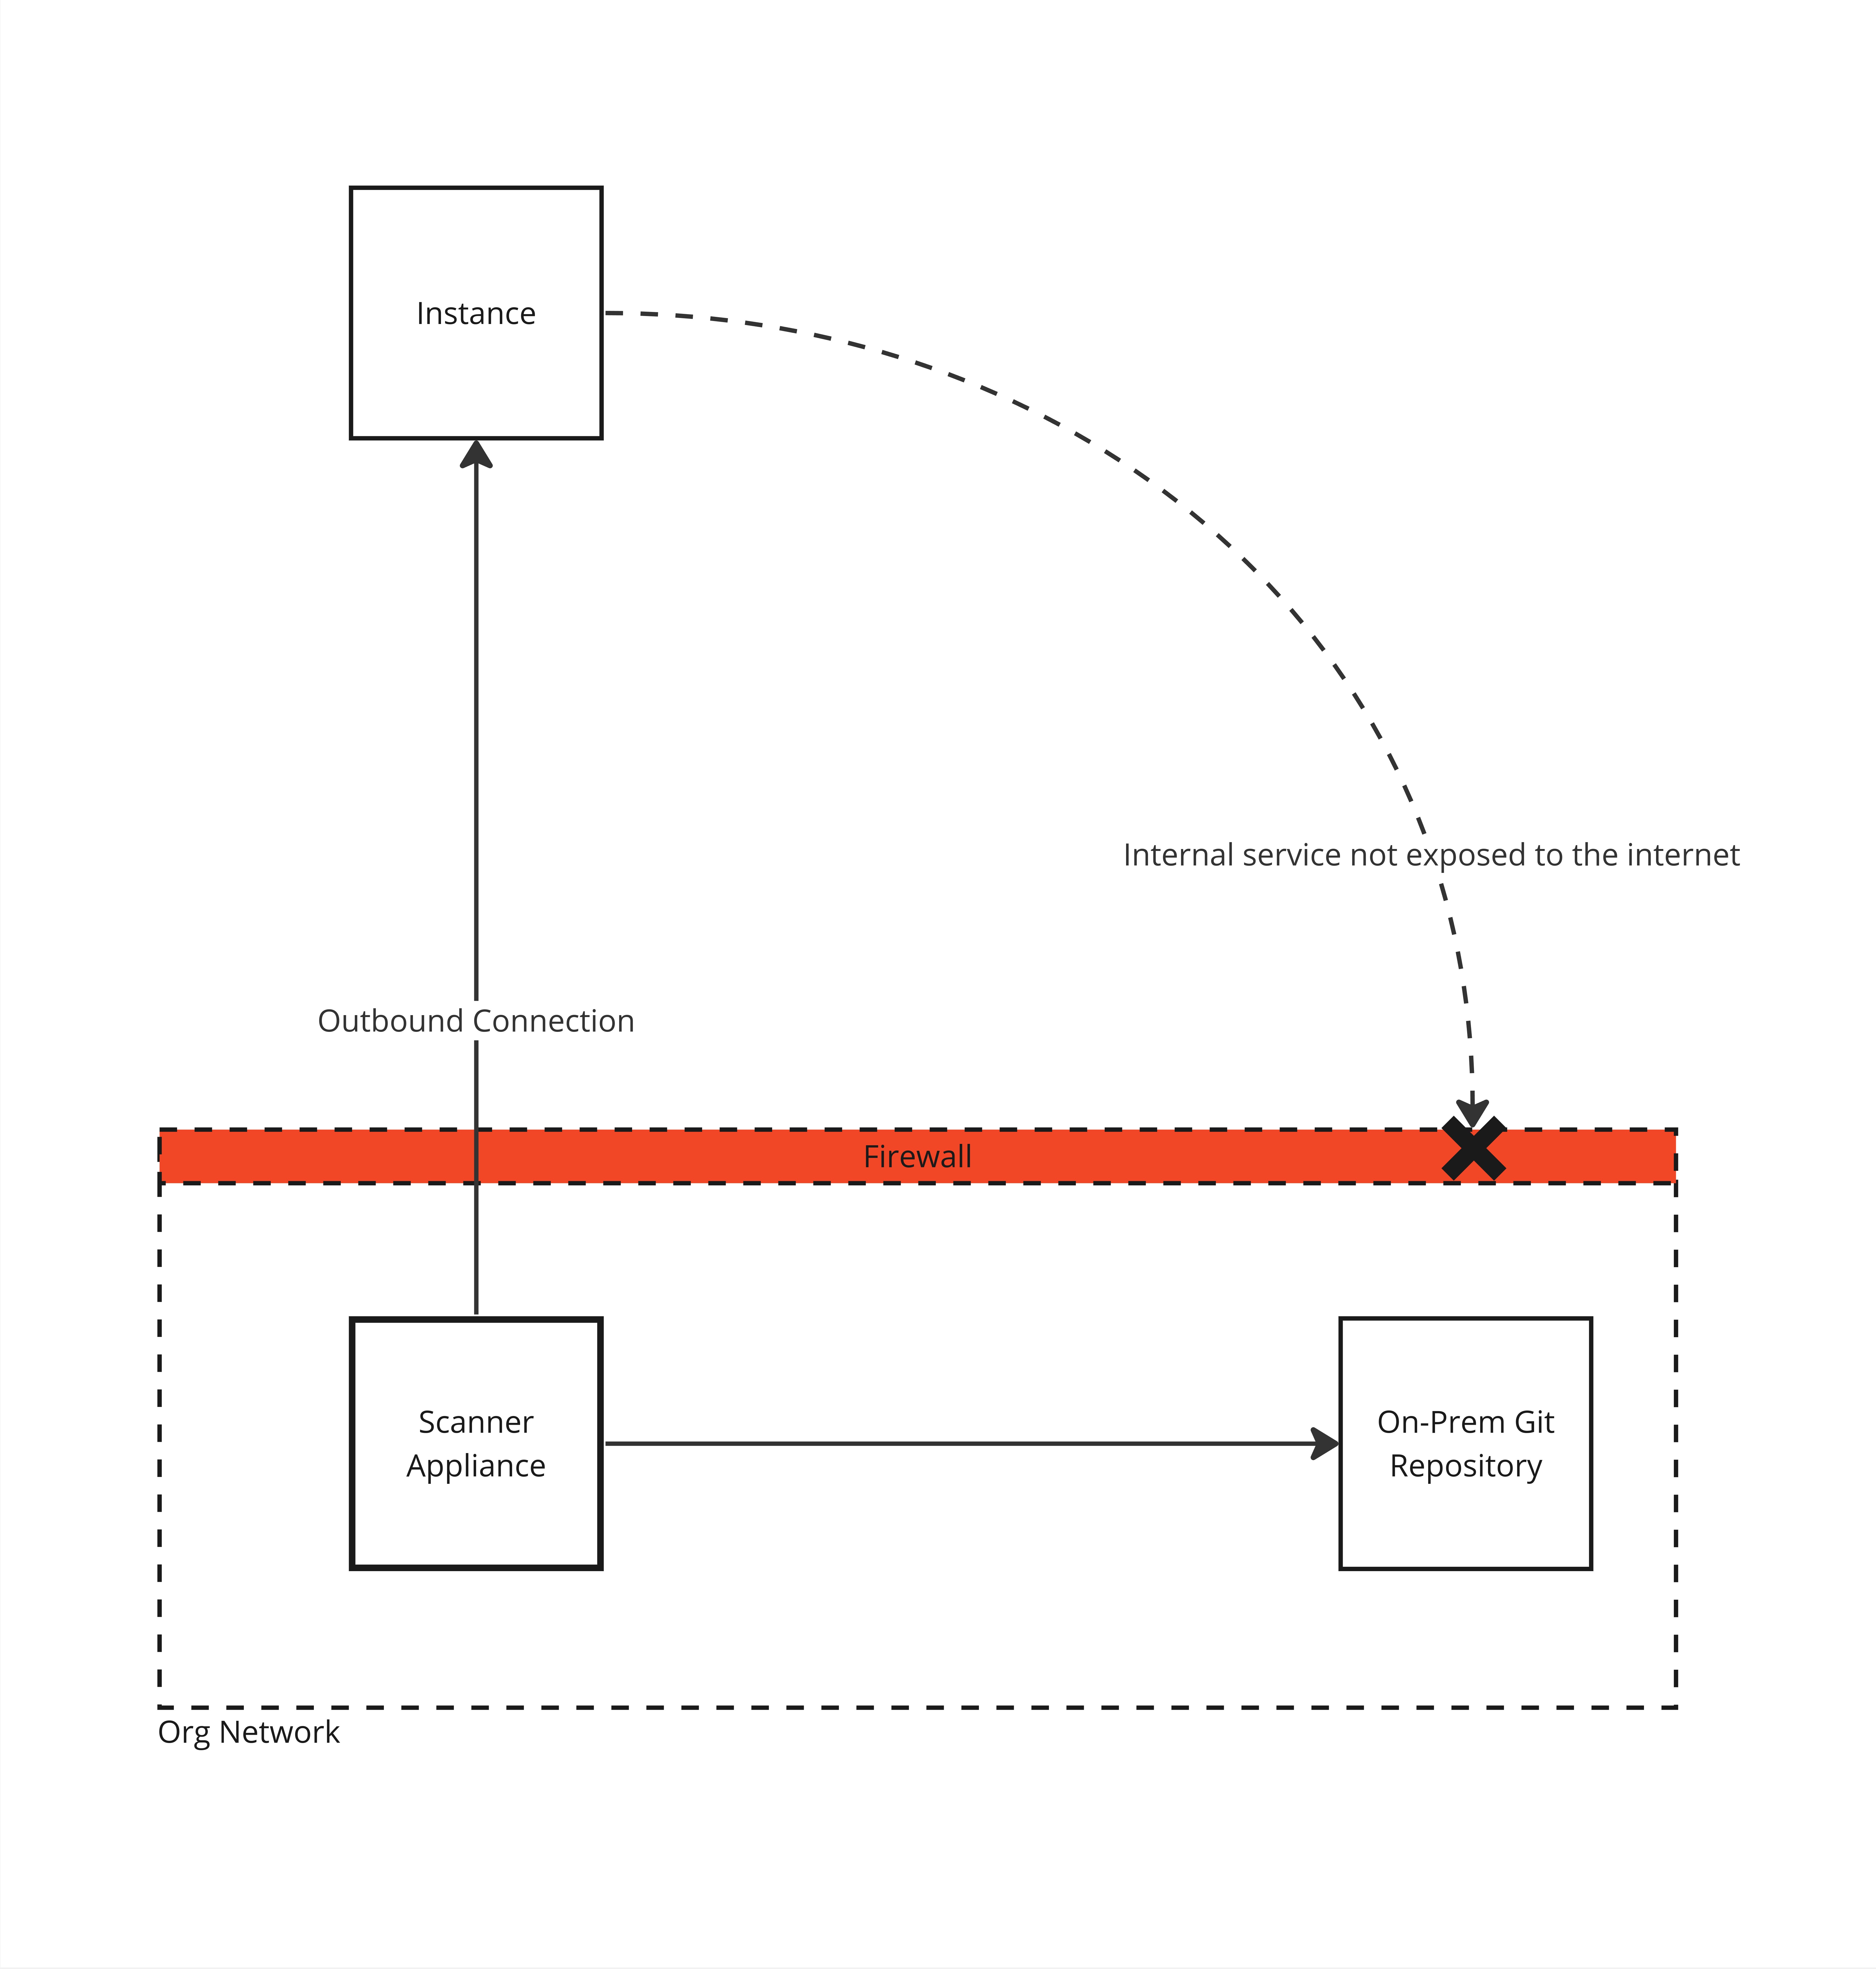
- Scan git repositories which are not accessible from the internet, you can deploy the appliance on a local adjacent network that does have access. The appliance will then scan this git repository and update the instance with the list of projects and their dependencies.
- Run resolution for dynamic package managers that don't have a lockfile (like
mavenorpip). - Keep your code in the bounds of your network. Cloning and scanning operations will be done on your infrastructure.

System Requirements
Hardware
Hardware requirements are determined by the amount of operations and the size of git repositories being scanned.
| Component | Minimum | Recommended |
|---|---|---|
| CPU | 2 | 4 |
| RAM | 8GB | 32GB |
| Storage | 50GB | 200GB |
Software
| Operation System | Software |
|---|---|
| Linux x64 (Ubuntu/Debian, CentOS/RHEL) | Docker 20.10.x or later (Engine & Client) |
Network Access
| Domain | Protocol (Port) | Description |
|---|---|---|
| INSTANCE_ID.illustria.io | HTTPS (TCP/443) | Scanner communication |
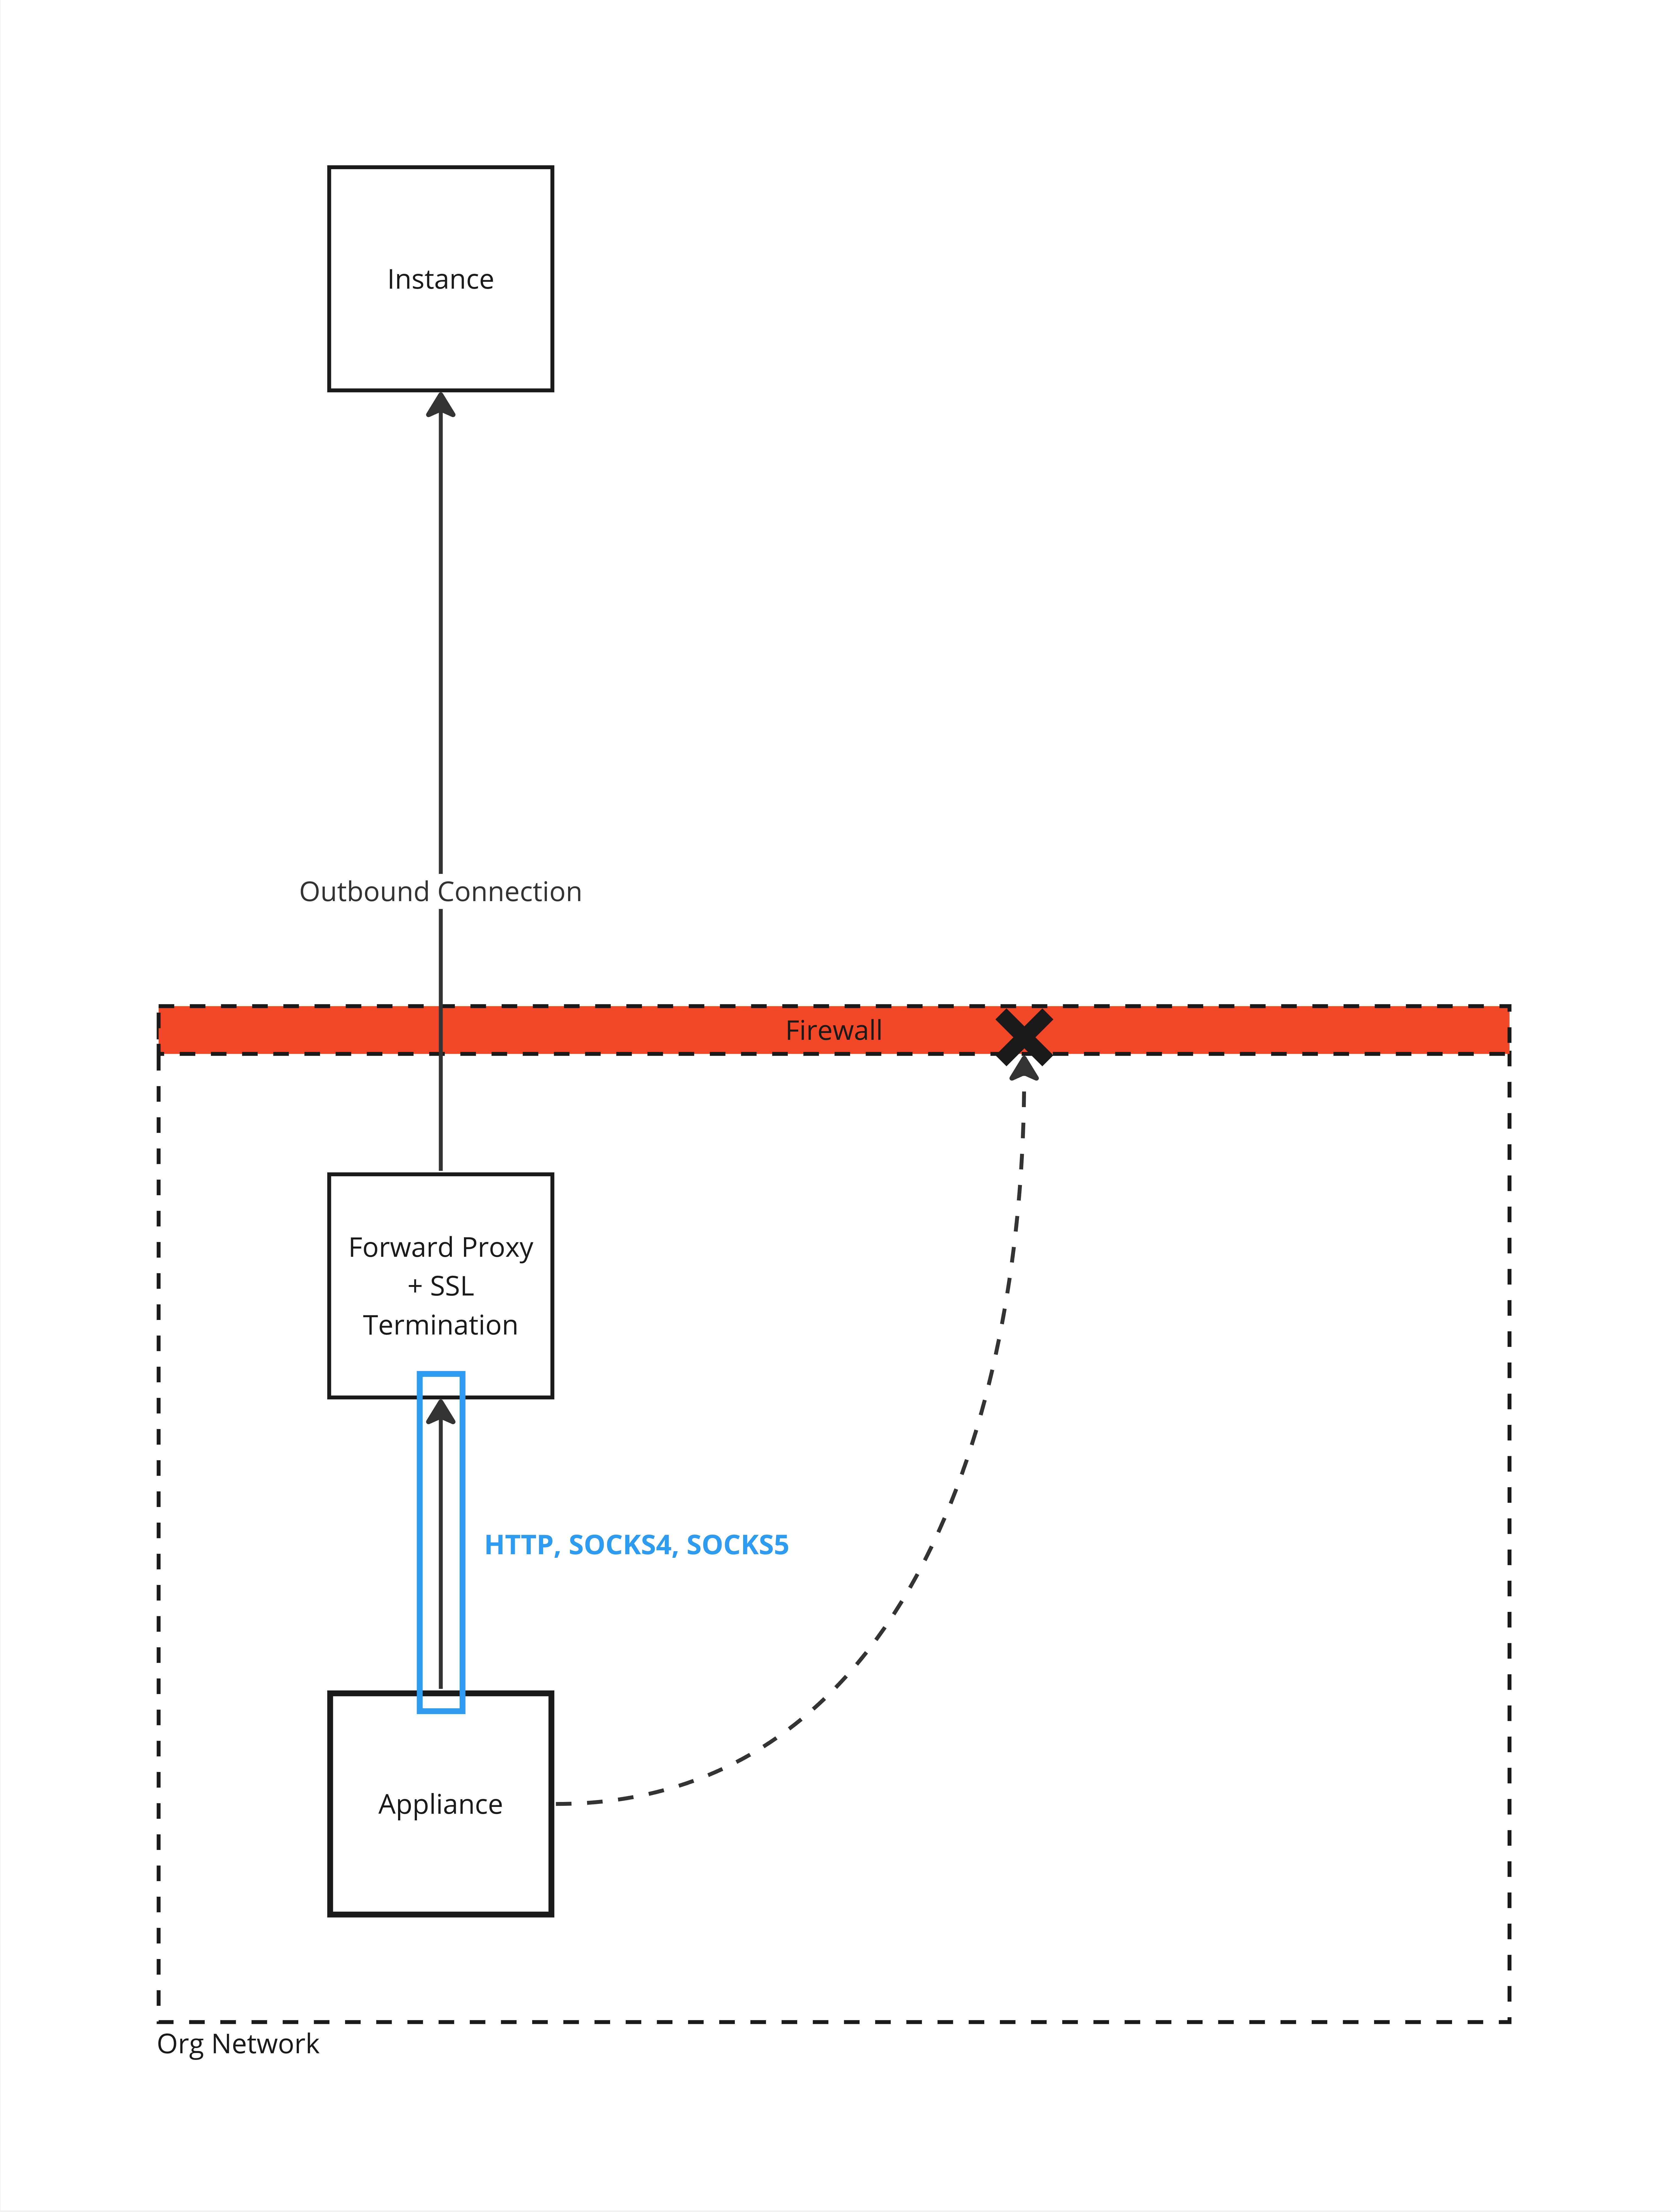
Forward Proxy Support

Supported protocols
HTTP, SOCKS4, SOCKS5.
SSL Termination
If the forward proxy terminates SSL requests, you can supply a PEM Certificates Bundle to the appliance.
Deployment
To get the full list of appliance supported parameters, run the following command:
docker run -it ghcr.io/illustrialtd/cnside-appliance/scanner:develop -h
The container needs to have access to the docker socket on the host. This is necessary requirement for the dynamic resolution of manifest files. You can always deploy the container with dynamic resolution disabled, removing the need for the docker socket.
There are two option to deploy the appliance
- Registration Token
- Appliance ID and Token
Deployment with a registration token will register and connect the appliance to the instance. This is a good option when you want to deploy a new appliance.
| Required Parameter | Description |
|---|---|
| INSTANCE_URL | The URL for the instance in the following format: https://INSATNCE_ID.illustria.io |
| DEPLOYMENT_TOKEN | The registration token to be used by the appliance. Can be acquired from the Management UI > Appliances > Scanner Appliances |
Run the following command:
docker run -d --name illustria-scanner-appliance -v /var/run/docker.sock:/var/run/docker.sock ghcr.io/illustrialtd/cnside-appliance/scanner:develop --paneld-url INSTANCE_URL --register-token DEPLOYMENT_TOKEN
Deployment with an Appliance ID and Token is a good option when you want to redeploy an appliance that has already been registered with the instance.
| Required Parameter | Description |
|---|---|
| INSTANCE_URL | The URL for the instance in the following format: https://INSATNCE_ID.illustria.io |
| APPLIANCE_ID | The ID of the appliance, can be acquired from the Management UI > Appliances > Scanner Appliances |
| APPLIANCE_TOKEN | The token of the appliance, can be acquired the same way as the APPLIANCE_ID above |
Run the following command:
docker run -d --name illustria-scanner-appliance -v /var/run/docker.sock:/var/run/docker.sock ghcr.io/illustrialtd/cnside-appliance/scanner:develop --paneld-url INSTANCE_URL --appliance-id APPLIANCE_iD --appliance-token APPLIANCE_TOKEN
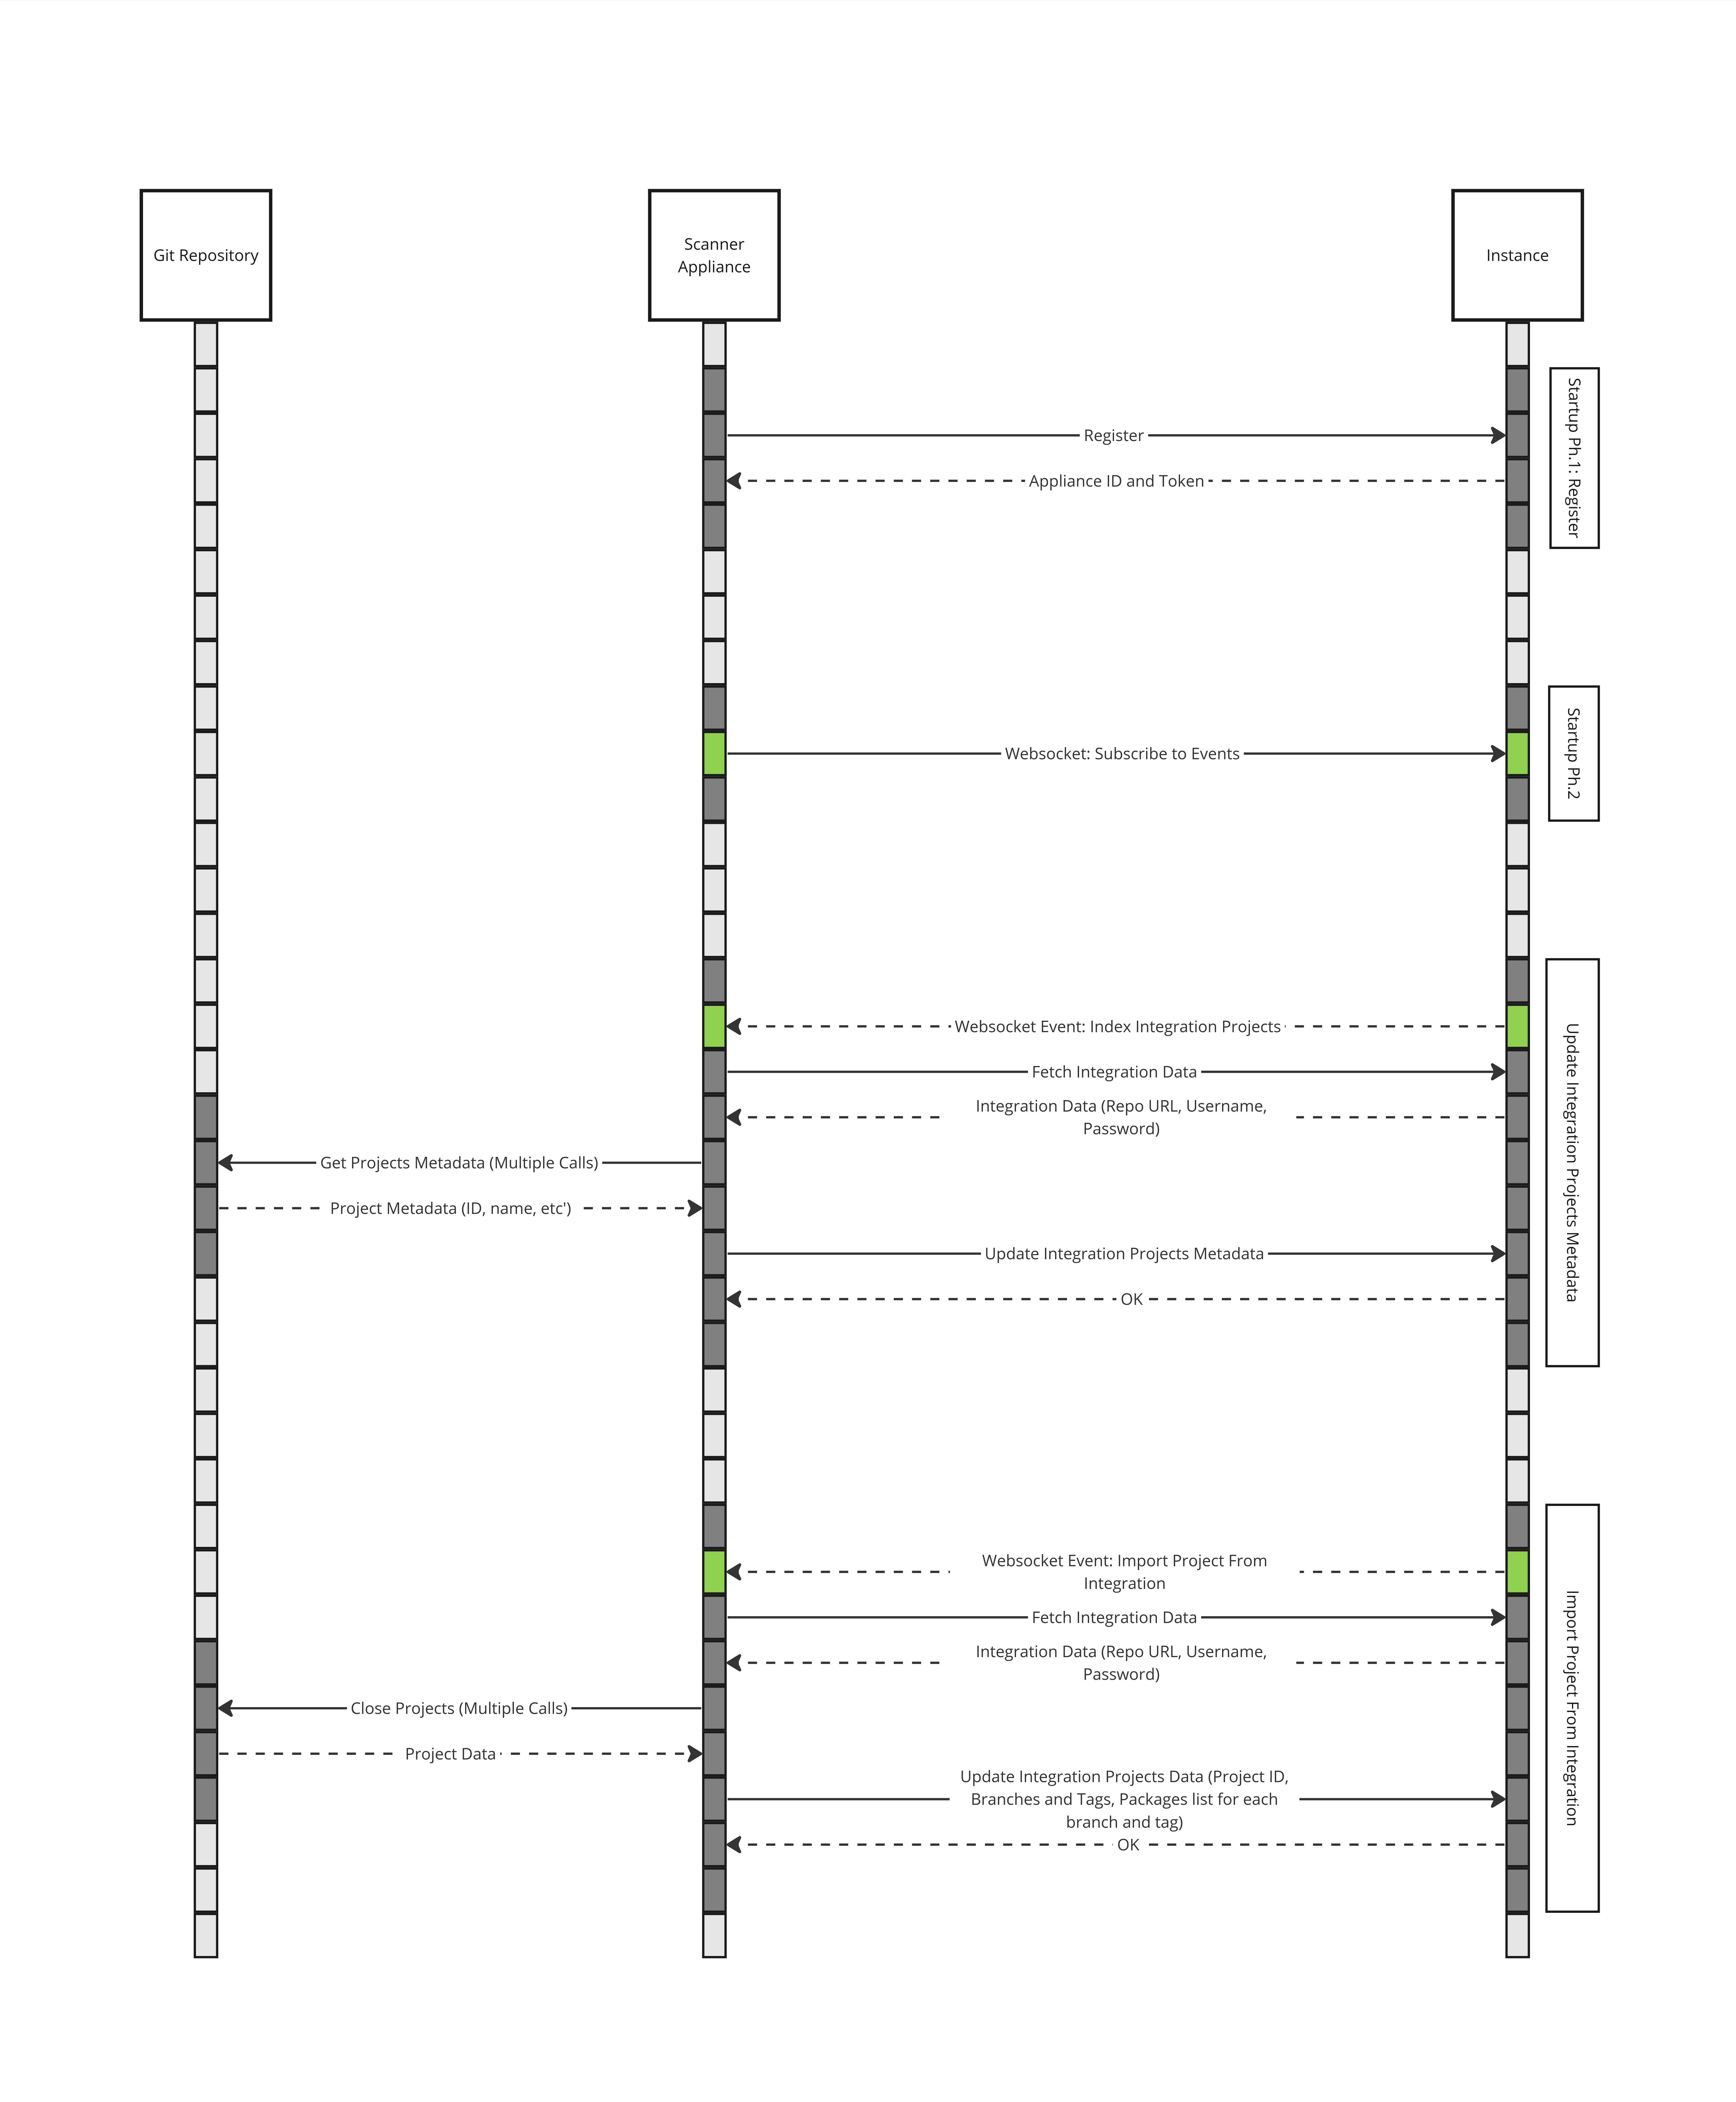
Network Communication HLD
In general the appliance does the following:
- Register with the instance.
- Subscribe to events.
- Invoke a procedure on received event.
This is the communication High Level Design for the scanner appliance:

Maven - Settings.xml
To pass custom repository configuration, after running the appliance, navigate to the maven cache
volume and add settings.xml file in the root of the folder.
If the volume is managed by docker, run the following command:
docker volume inspect illustria-dr-maven-cache
In the output you should see a Mountpoint:
[
    {
        "CreatedAt": "2024-06-24T15:49:44+03:00",
        "Driver": "local",
        "Labels": null,
        "Mountpoint": "/var/lib/docker/volumes/illustria-dr-maven-cache/_data",
        "Name": "illustria-dr-maven-cache",
        "Options": null,
        "Scope": "local"
    }
]
Navigate to this mount point with sudo / root / admin and add the setting.xml file.
Dynamic resolution DNS records
If the running container can't resolve DNS records, you will need to define DNS resolution for the docker daemon (https://docs.docker.com/config/daemon/).
- Create the config file if it doesn't exist:
- Linux
- Linux (Rootless)
- Windows (Powershell)
sudo touch /etc/docker/daemon.json
touch ~/.config/docker/daemon.json
New-Item C:\ProgramData\docker\config\daemon.json -type file
- Add the DNS configuration in the settings file (replace the records with your own):
{
    "dns": ["8.8.8.8", "8.8.4.4"]
}
- Restart docker daemon:
- Linux
- Linux (Rootless)
- Windows (Powershell)
sudo systemctl restart docker
systemctl --user restart docker
restart-service *docker*
Or via the Destop UI > Troubleshoot > Restart Docker Desktop.
Dynamic resolution DNS static records
Every host entry that has been passed to the scanner appliance will be used by the child containers when executing dynamic resolution.
To pass static host entries (https://docs.docker.com/reference/cli/docker/container/run/):
docker run ... --add-host={fqdn}:{ip_addr} --add-host=acme.local:192.168.0.2